I finally had a chance to play with Microsoft Azure Active Directory in a recent project. I found the experience to be very interesting - Azure AD itself is an amazing, powerful product with a lot of potential. It certainly has a few rough edges here and there, but it’s pretty clear Microsoft are putting a lot of effort into it as it’s forming the cornerstone of how it authenticates all of it’s services including Office 365.
Azure AD gives you the ability to securely manage a set of users and also gives the added benefit of allowing two-factor authentication (2FA), single-sign-on across applications, multi-tenancy support and ability to allow external organisations to authenticate against your application.
This blog series will outline the minimum set of steps that you need to perform to quickly and easily add Azure AD authentication to an existing ASP.NET MVC 5 (or 3 or 4) site (or a new one if you select the No Authentication option when creating it) as well as configure things like API authentication, role authorisation, programmatic logins and deployments to different environments.
There are already tools and libraries out there for this - why are you writing this series?
Microsoft have made it fairly easy to integrate Azure AD authentication with your applications by providing NuGet packages with most of the code you need and also tooling support to configure your project in Visual Studio. This is combined with a slew of MSDN and technet posts covering most of it.
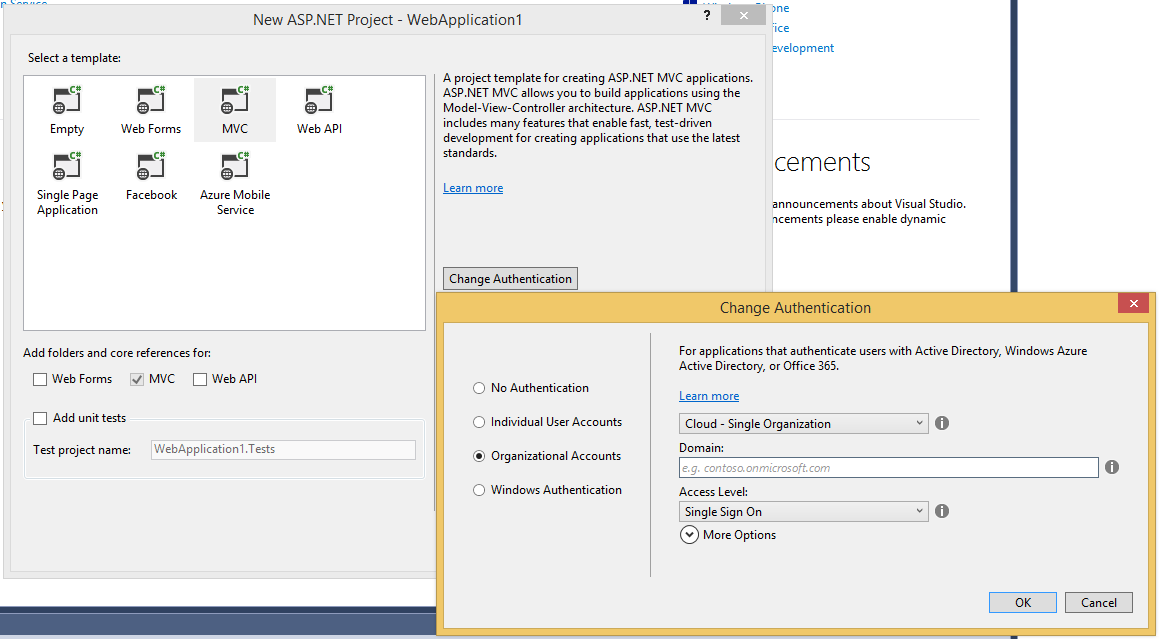
When it comes to trying to understand the code that is added to your solution however, things become a bit tricky as the documentation is hard to navigate through unless you want to spend a lot of time. Also, if you have Visual Studio 2013 rather than Visual Studio 2012 you can only add authentication to a new app as part of the File -> New Project workflow by choosing the Organizational Authentication option:

Visual Studio: File > New Project > ASP.NET > Change Authentication > Organizational Authentication
If you have an existing ASP.NET web application and you are using Visual Studio 2013 then you are out of luck.
Furthermore, the default code you get requires you to have Entity Framework and a database set up, despite the fact this is only really required if you are using multiple Azure AD tenants (unlikely unless you are creating a fairly hardcore multi-tenant application).
If you then want to add role-based authentication based on membership in Azure AD groups then there is no direction for this either.
For these reasons I’m developing a reference application that contains the simplest possible implementation of adding these features in an easy to follow commit-by-commit manner as a quick reference. I will also provide explanations of what all the code means in this blog series so you can understand how it all works if you want to.
You can see the source code of this application here and an example deployment here. The GitHub page outlines information such as example user logins and what infrastructure I set up in Azure.
What are you planning on covering?
This will be the rough structure of the posts I am planning in no particular order (I’ll update this list with links to the posts over time):
- Authenticating an ASP.NET MVC 5 application with Microsoft Azure Active Directory
- Explaining the code behind authenticating MVC5 app with Azure AD
- Add role-based authorisation based on Azure AD group membership
- Creating a SharePoint-style user lookup control backed by Azure AD
- How to get a list of all users in a particular group
- Deploying your application to multiple environments
- How to authenticate against ASP.NET Web API using Azure AD
- How to authenticate programmatically in a console app (or other non-human application)
- Multi-tenancy support
I’m notoriously bad at finishing blog series’ that I start, so no promises on when I will complete this, but I have all of the code figured out in one way or another and the GitHub should at least contain commits with all of the above before I finish the accompanying posts so *fingers crossed*! Feel free to comment below if you want me to expedite a particular post.
More resources
I came across some great posts that have helped me so far so I thought I’d link to them here to provide further reading if you are interested in digging deeper:
- Azure OAuth 2.0 – Authorization Code Grant Walkthough
- Azure OAuth 2.0 – Authorization Code Grant
- Azure OAuth 2.0 – Client Credential Grant
- Azure OAuth 2.0 – Tokens and Endpoints
- Azure OAuth 2.0 – Overview
- Using ADAL’s AcquireTokenBy AuthorizationCode to Call a Web API From a Web App
- ADAL for Windows Phone 8.1 – Deep Dive
- Use OWIN & Azure AD to Secure Both MVC UX and Web API in The Same Project
- Setting Up an ASP.NET Project with Organizational Authentication Requires an Organizational Account
